Ultra White Collar Boxing – ouch!

Getting punched hurts. Then you hug afterwards. It’s a weird pastime.

Going through divorce sucks so I’ve made sure to pack my year with longer term projects to give me focus. I ran four 50 mile races as part of the Centurion Running Slam. Normally these races run until November but due to some changes for 2023 the last race was in September. I needed something to fill that sucky void between Autumn and Christmas and stumbled on a Facebook Ad for Ultra White Collar Boxing (UWCB). It started the Monday immediately following my last race. I was intrigued. Everyone has watched Rocky and wondered what it would be like to step into a ring. I figured if I was going to find out then this was the year. 

So what is UWCB? 

It’s a fund raising event held in over 100 cities across the UK. Beginners train twice a week for 8 weeks, to take part in a real boxing match in front of a 1000+ crowd in a black-tie event. 

Cost

Cost to take part and train is zero but you have to commit to sell 10+ tickets. These are around £25 for standing for £45 for sitting at VIP tables. You also need to raise at least £50 in donations. If you don’t make the required sales by certain deadlines you’ll be kicked out of training.

Typical schedule

Equipment

The UWCB website sells an equipment set that includes all you need for training or you can buy it elsewhere. 

160z boxing gloves – these are for training only, on the night you will be provided with the UWCB gloves in blue or red for your corner. 

Hand wraps – needed for the fight, many wear them in practice, I kept forgetting. 

Gum shield – needed for every session after week 2. Get used to them. I nearly vomited on the dog when trying mine in the kitchen. 

Shoes – you can train in socks or clean trainers (not the one’s you walked in with). Proper boxing boots are relatively cheap. I got mine on Vinted for about £8. These are boot style to support ankles and with a minimal sole so reduced risk of ‘falling off’ the shoe as you twist and turn. For the fight you will need some sort of shoe.

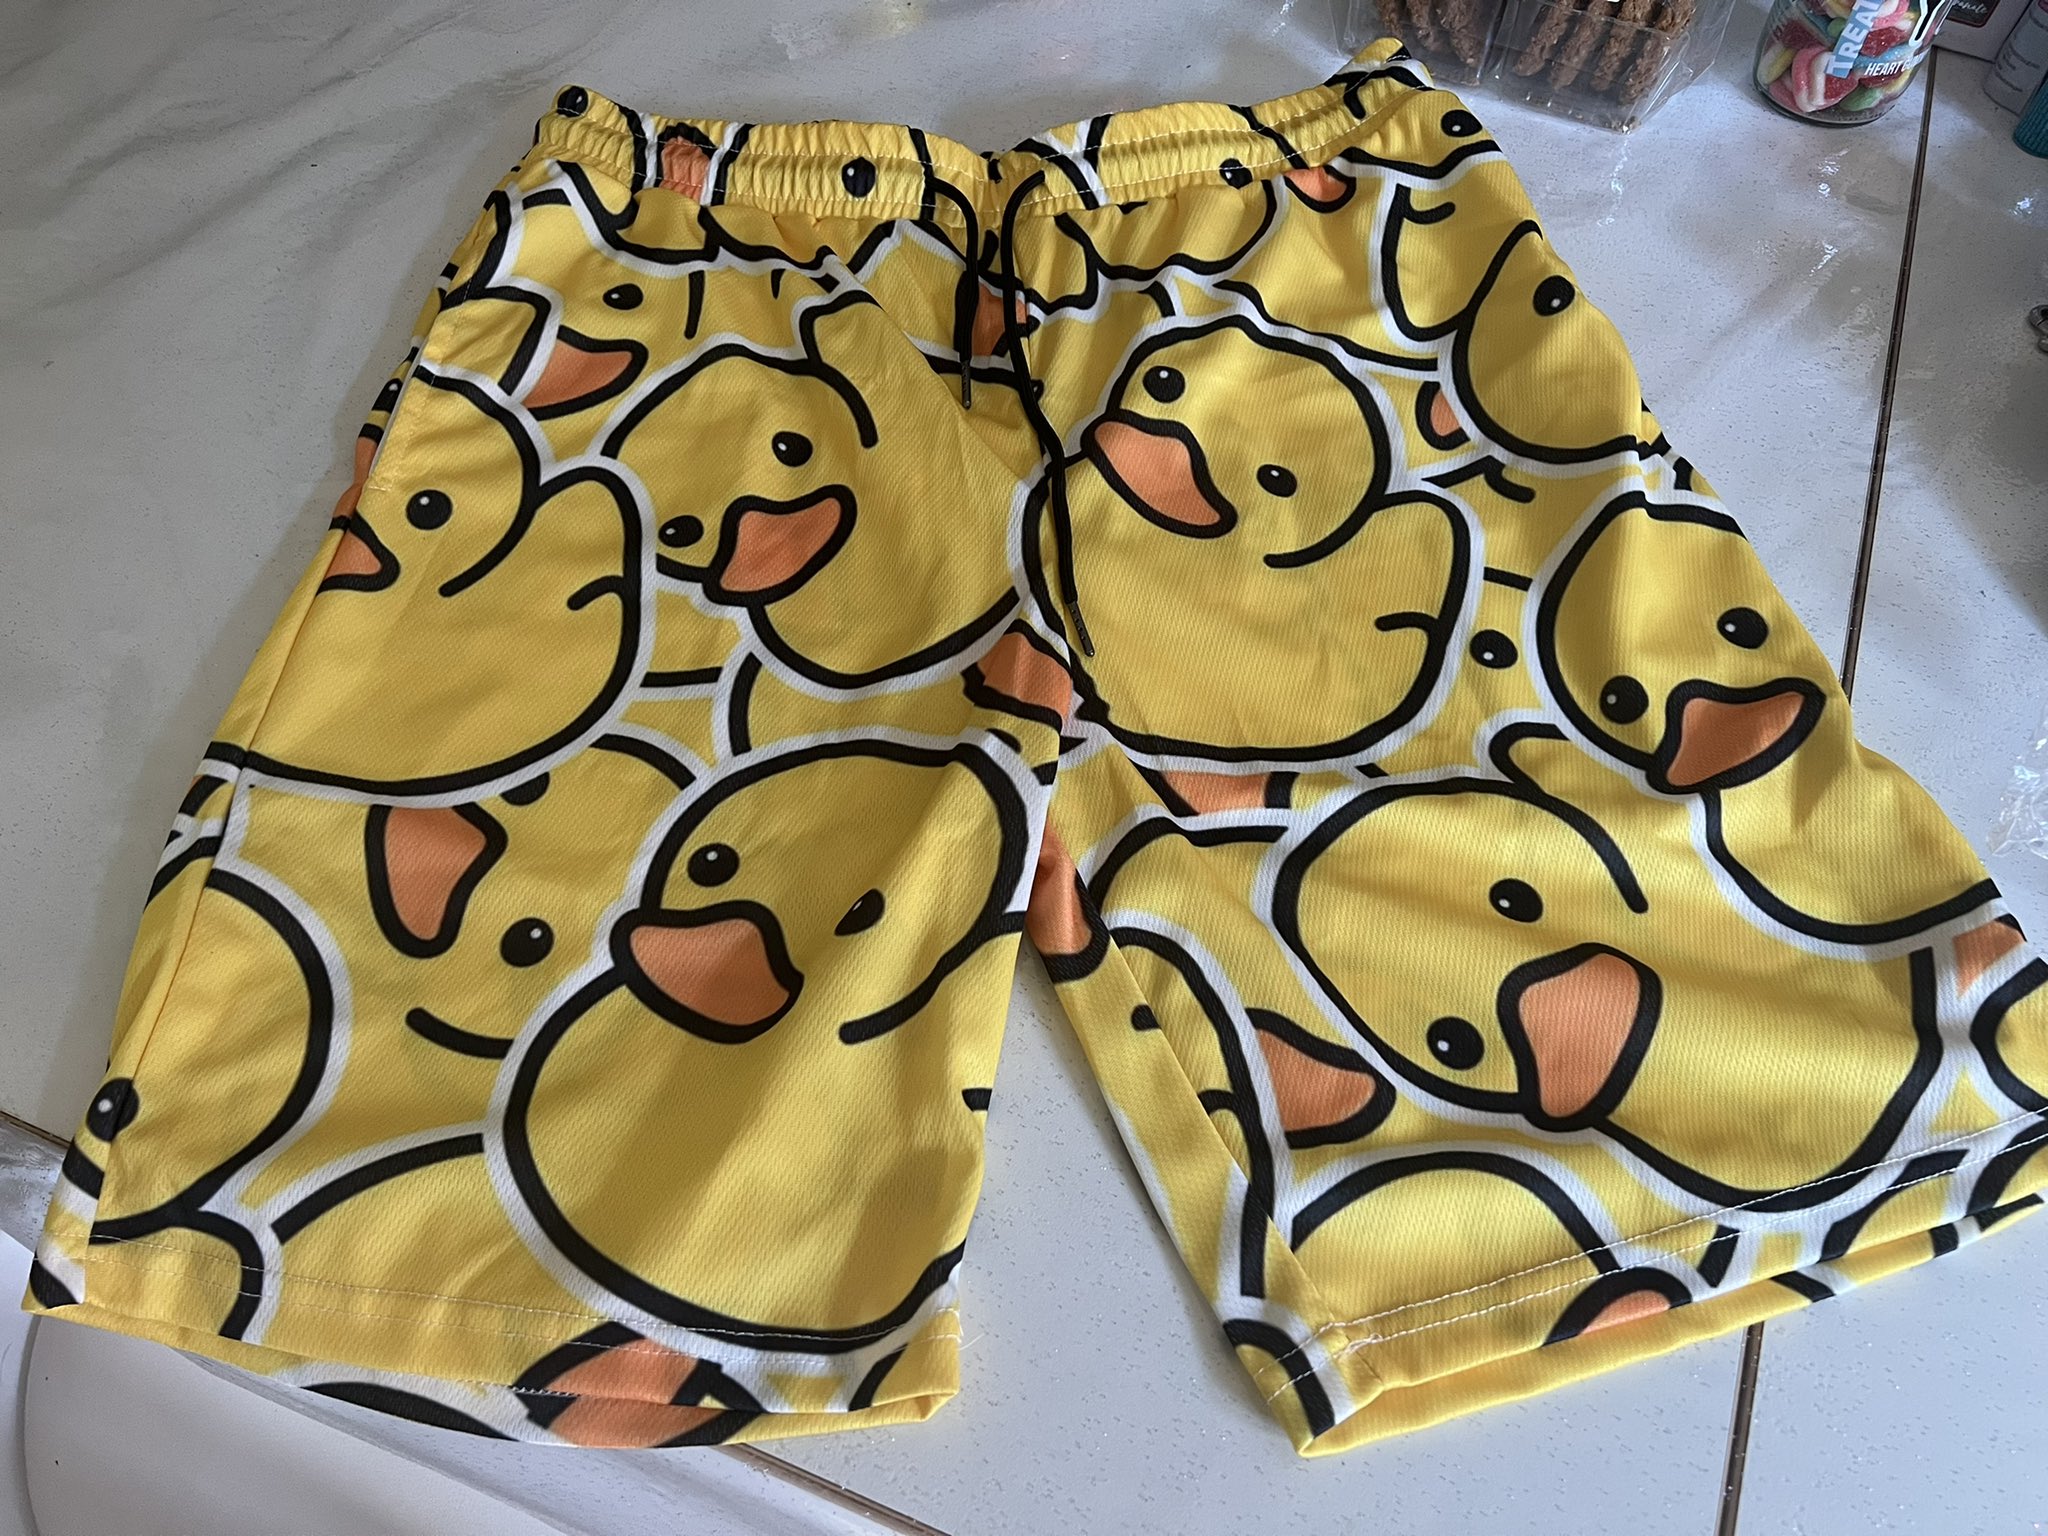
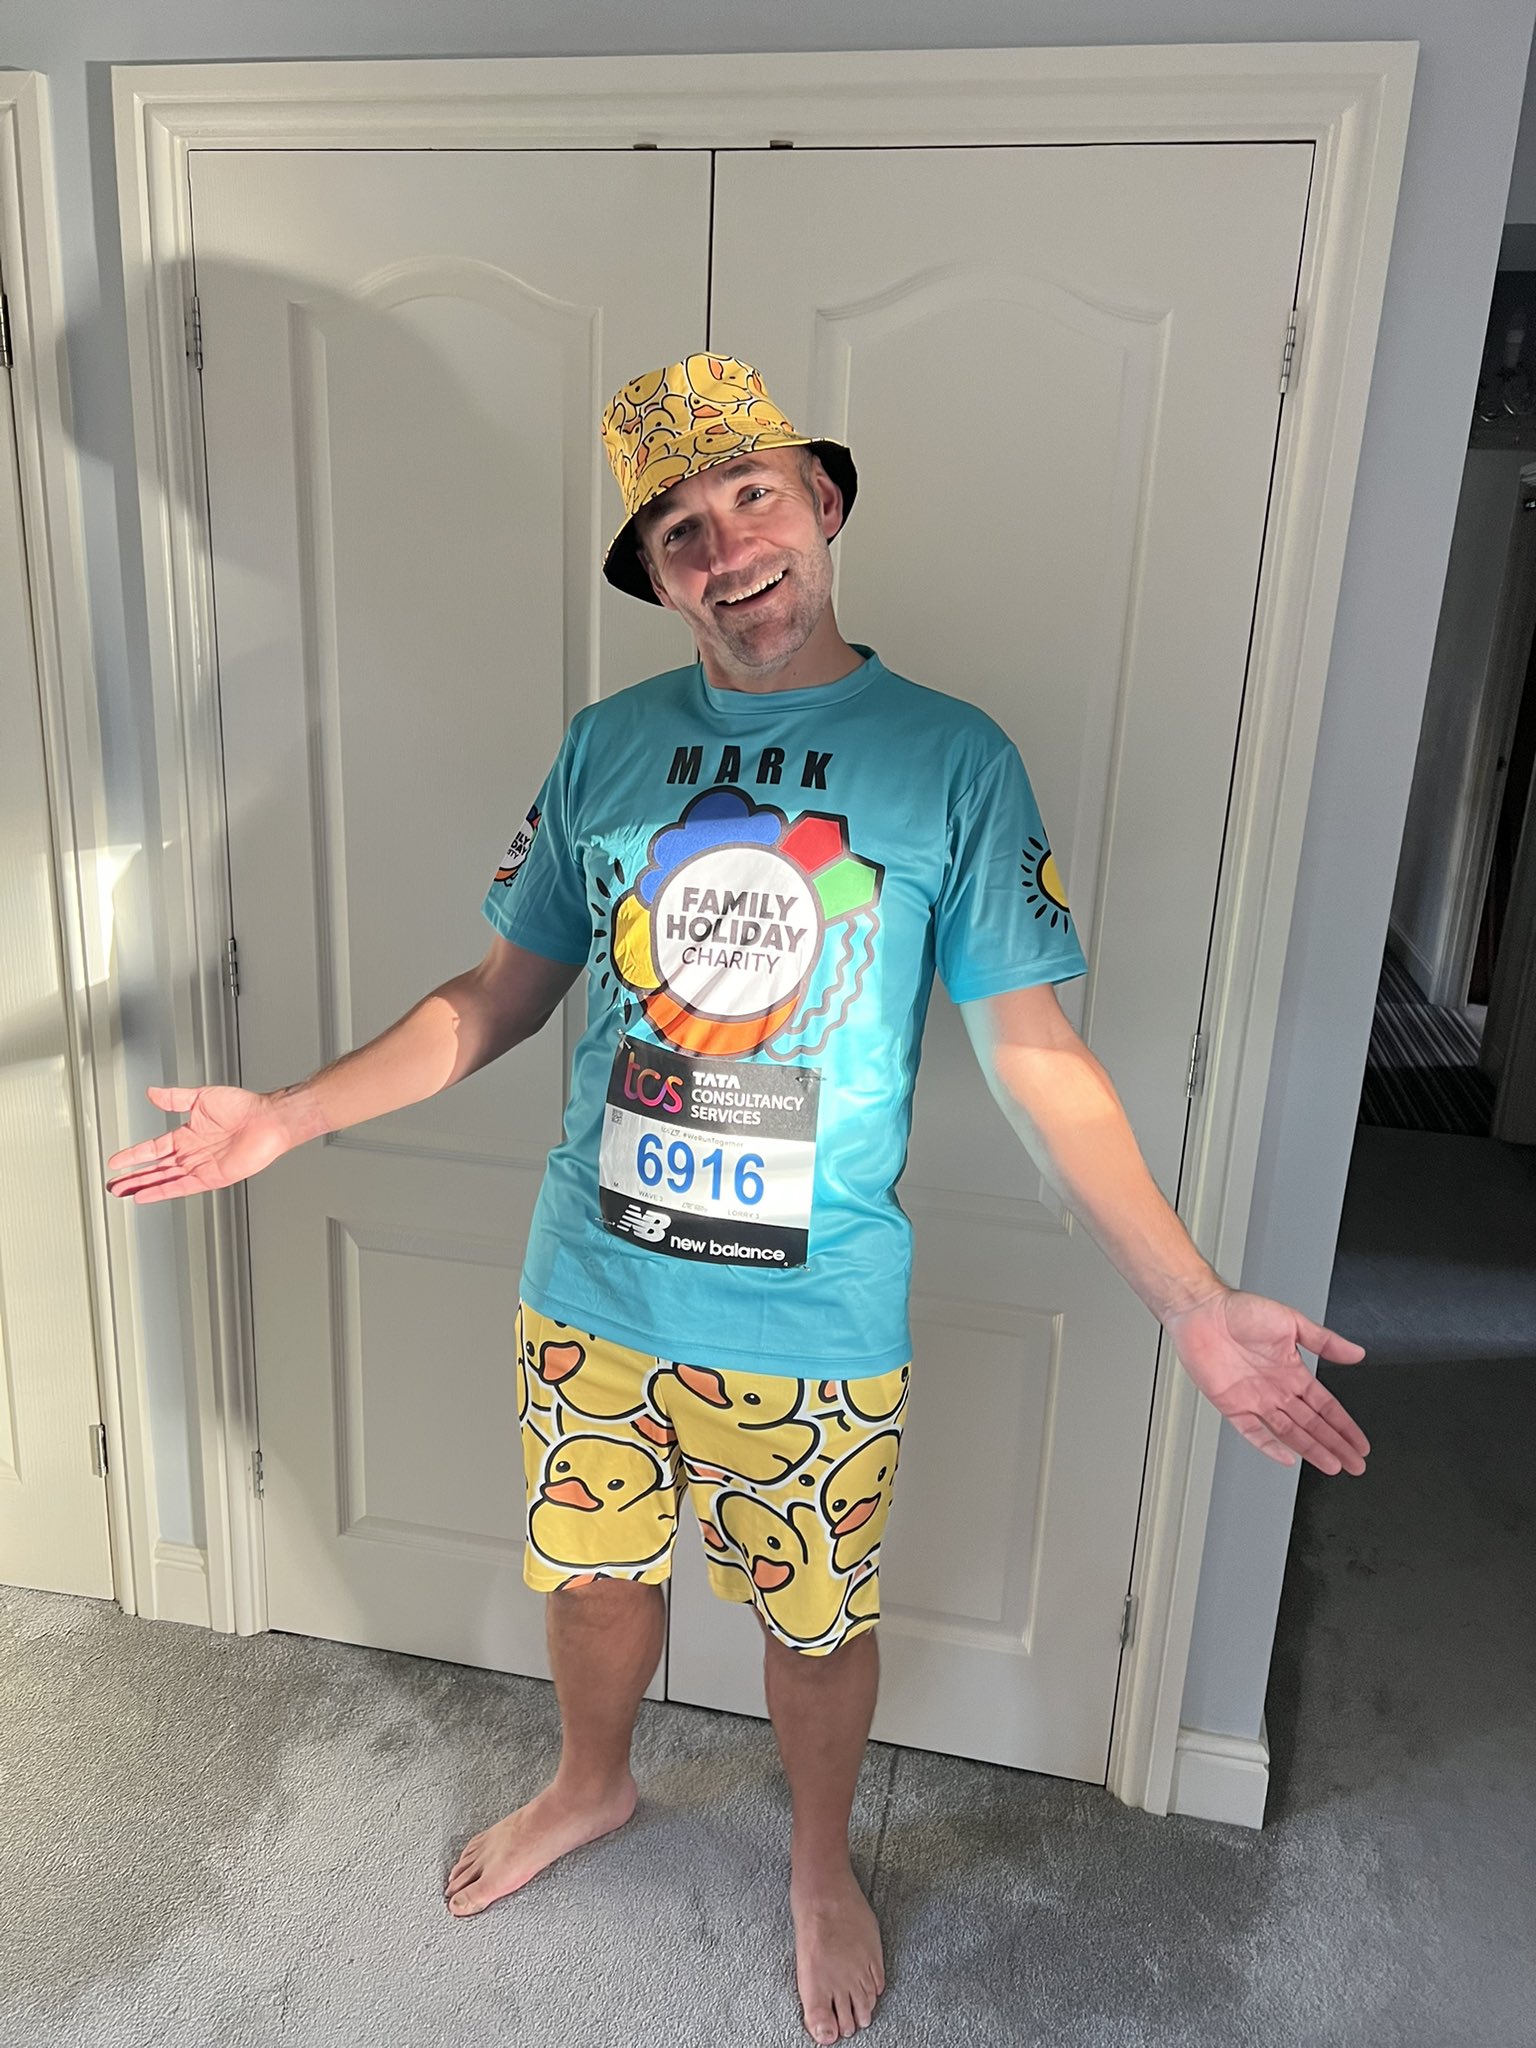
Shorts – In training any shorts will do. For the fight you want something that will make you feel like a boxer. Two weeks out from the fight you’ll know your colour and can get shorts to match. Again mine were about £3 from Vinted. Proper boxing shorts have a clear waistband that helps denote your waist and the ‘no punch zone’. 

Top – any top for training. It gets HOT in a gym so lighter the better. For the fight they provide you with your vest with fighter name and any sponsor logos on. 

Groin guard/box (for the men) – required for the fight only. At least one boxer on the night caught a fist to the nuts and even with a box was a little discomforted. 

Chest protector (for the women) – Yeah I have no idea how they work but designed to protect the boobs.

These boots are made for fighting

Training

Twice a week, for 8 weeks. In my case it was 8:30pm on Monday and Wednesday. Just enough time to get home, fall asleep on sofa and regret having to go back out in the cold to get punched. You need to attend at east 50% of sessions. I’d recommend attending all. There will be key dates to attend including sparring (so they can match you up) and weigh-in.

Fight day packing –  

Trainers/boots 

Shorts 

Gumshield 

Groin Guard 

Hand Wraps 

Wash bag for shower 

Towels x 2 (1 to take to the ring with you and 1 for afterwards)  

Smart Clothes and shoes for after your fight 

Food – some will be waiting a while to start. Even the first fighter is likely 3.5hrs from arrival to being ready to go 

Water for the fight – small sports cap bottle 

What’s it actually like? 

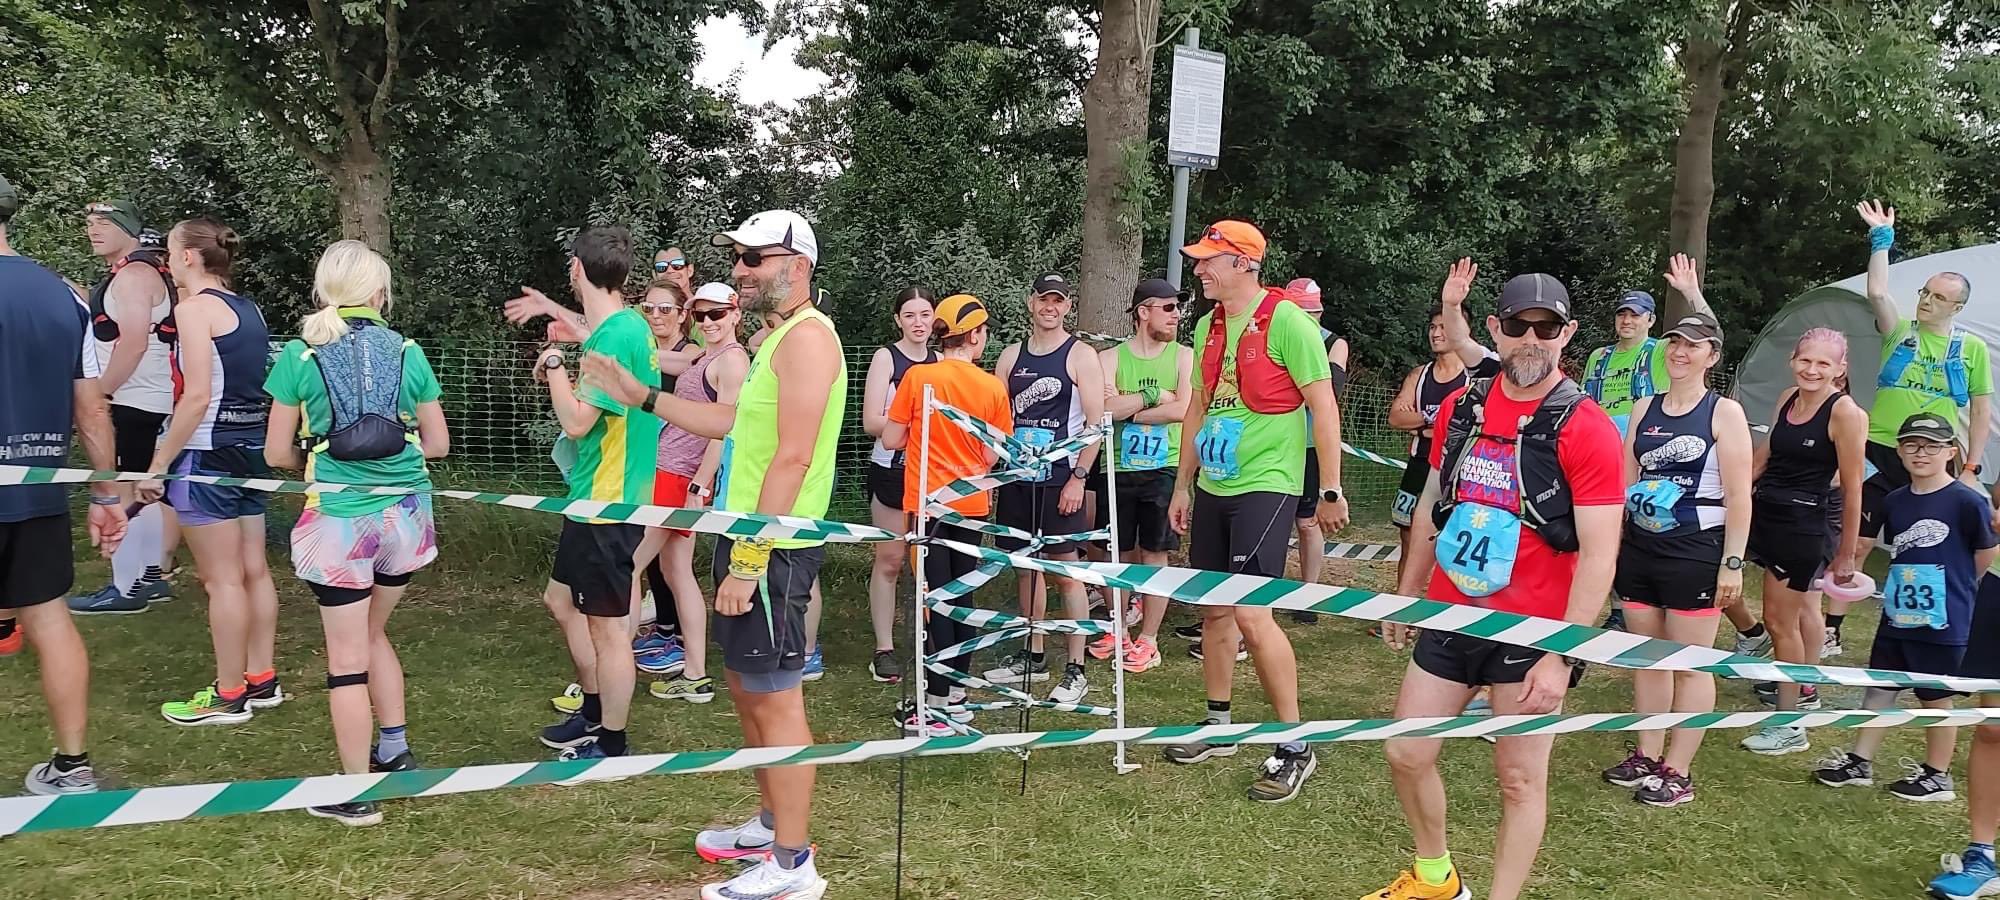
Odd. You bundle in a sweaty gym, with a mix of entrants from cocky 18 year olds made of pure muscle and sinew to overweight bald blokes living out a mid-life crisis (me). The oldest entrant I believe was 56. He was hard as nails. Women are actively encouraged but often a far smaller number. For mine it was about 20 women and 100 men. A couple will have done a previous event and either caught the bug or had scores to settle. You have to be fit to fight so 8 weeks of perfect training could go to waste if you break a rib the week before and then need to try again the next time around. 

The first few sessions are getting you comfortable with basic punches and moving around. They might do a fair amount of boot camp style drills to get your fitness up. Many will say the training will leave you the fittest you’ve ever been and it may well be true. Some entrants struggled to jog on the spot in the first session. In my case I had the base fitness from running, no upper body strength and a dodgy knee from the last 50 miler so I finished the 8 weeks having hurt leg muscles I never knew I had and unable to raise my left arm without grimacing. 

Initially you’ll do very slow and gentle drills with partners to learn the techniques. One throws a series of punches into the gloves of the other, then repeat. They’ll gradually build in intensity and complexity and include blocks and slips to move out the way. Some drills will be purely one side, others your partner will be encouraged to punch (lightly) back if you drop your guard during a move as a reminder.

Somewhere around week 4 you’ll have your first sparring session. This is where you pair off to someone and have to go it alone, no drills, just try and punch them and avoid getting punched. If you’ve been a scrapper from school days this is probably easy. If you’re a spindly armed runner who never had brothers to rough house with it’s very unsettling being encouraged to brawl and potentially hurt a fellow grown up. This sparring will follow a friendly chat from the coach where they’ll inform you that every hit to the head will cause a small degree of brain damage and invite anyone having second thoughts to head home. It is very tempting. 

The point of sparring is to improve technique and simulate the fight, not to knock chunks out of each other so it’s down to you and your partner to communicate, advise how hard you intend to go and let them know if it’s too much.  

 A couple of times they’ll run through simulations of the night with 2 minutes of drills or sparring, 1 minute recovery, then repeat 3 times. 6 minutes of exercise with breaks sounds like nothing, especially to an endurance runner but they are not easy and it was noticeable how many struggled, me included. 

The weigh-in 

In week four you’ll get weighed to establish your group. The coaches will likely have cheesy mugshots with your name, weight and age to help them eventually pair you up. Weight isn’t everything but is a quick way to group you for sparring sessions. In an ideal world you’ll be halfway to be fit and a decent shape. I was still gaining weight post-ultra as dodgy knee meant I couldn’t run and as hard as the boxing sessions were, two hours a week wasn’t enough to keep the belly away.  

I can hear music 

Two weeks out you need to submit your entrance music. Every fighter is announced and enters through the smoke to an arena echoing to their chosen jam. You’ll only get about 30 seconds played so nothing with a long intro. 

Match Up Night 

With about a week and half left, you attend an extra event, in my case at Pop World where they finally announce who you’ll be fighting. This is based on weight, age, height, fighting ability. Having spent the last few weeks sparring with those of the same weight, it’s a relief to see the double hard nutters paired off as they gradually whittle down. I was paired with Paul, a lovely chap I’d sparred a lot and close ability. He was 5 years my junior though so had better reflexes. We were in ring 2. For Milton Keynes event they had two rings running at the same time. I was in blue corner and Paul in red. For the remaining training sessions you’re not allowed to spar with your matched fighter. In reality a lot of the last week is very gentle as nobody wants to inflict an injury in sparring that ruins two peoples fights. Some fighters won’t be paired up and no match exists so a stand-in from another UWCB locally will be sought out.  

The Arena 

It will vary but for Milton Keynes it was at Planet Ice (an ice rink) so obviously cold. The set up was professional with two rings, lights, smoke machine, sound rigs and announcers. It’s the closest you’ll get to walking out for a professional bout. They set up two huge bars but from what I saw on the night they were not enough to cope with the demand.

Dress Code for Spectators (and you after the fight) 

Smart dress is a must. Smart shoes, trousers, shirt and tie is a minimum. Dresses or suits for women. No Jeans, chinos, check shirts or trainers will be allowed into the venue. 

Fight day itinerary  

May change for your event, so this is a guide only  

1pm – Boxers arrive for medicals – they’ll check blood pressure and pulse and ask questions on allergies, medications etc. Only once you pass are you confirmed to fight. Do not drink energy drinks before and spike your heart rate. 

2:30pm – Organiser’s talk through 

Sometimes from 3-4pm they will announce the running order. Suddenly you know if you’re fighting at 4:30pm or closer to 10pm. 

3.30pm – Doors open for VIPs 

3:50pm – Boxers attend meeting with the referee and paramedics  

4pm – Doors open for standard tickets 

4.15pm – Ring Parade – Reds and Blues are grouped and move out into the rings to be greeted by adoring fans  

4.30pm – First fight – Rounds are 3x2min with 1min gaps. Including entrance music, awards and general messing it’s around 12-13 minutes between fights so if you’re 12th fight you’re probably going to be 2.5hrs in.

The day is a lot of waiting around. Wait for a medical, collect your fight night tee, wait for the talk through, wait for the running order to be announced, wait for the referee talk. 

You’re allowed to head out to mix with your family and friends before your fight but need to be back warming up 3 fights prior to yours. 

As Paul and I were fight 12 we had a couple of hours to kill so mixed with tables before getting ready. 

The warm up area is hidden behind a curtain and where fighters are fitted for headgear – you have to wear this, but won’t have in training. It’s not hugely uncomfortable or restrictive. You’ll also get the colour coded gloves put on. Then do some light practice with a coach, and try not to freeze to death in an ice arena. The event supplies corner teams who’ll carry your water bottle and towel so you just have to wait for your cue music and march out like a fighter/lamb to the slaughter. 

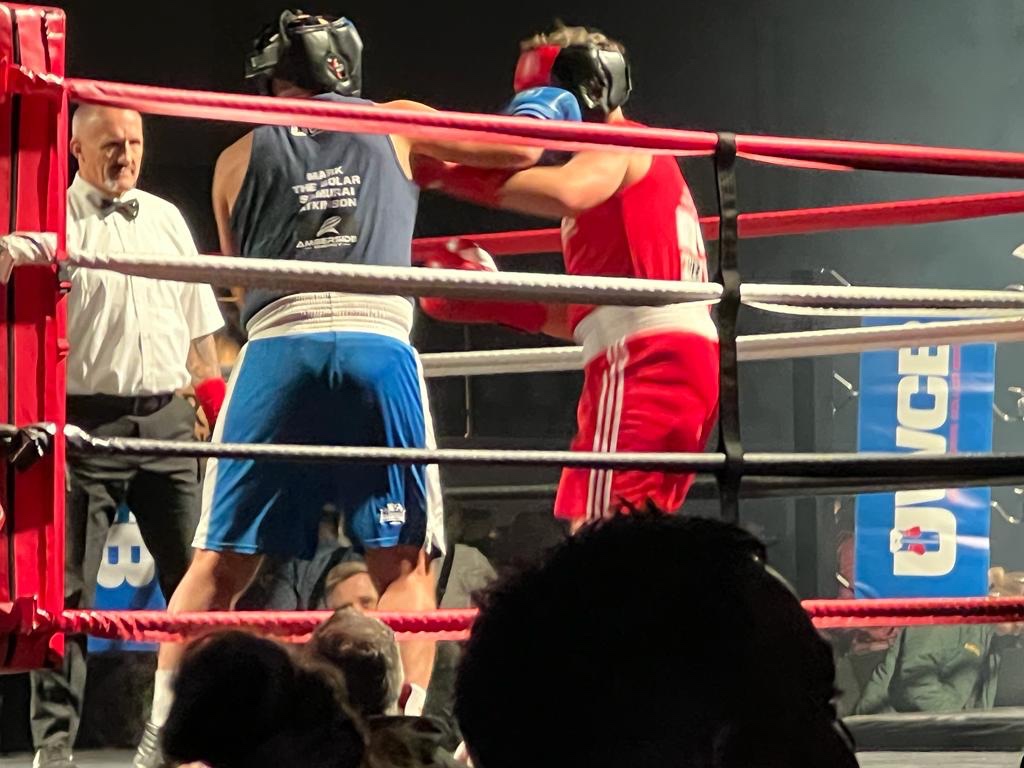
The fights have judges just like the real thing. The referee is purely there to protect each of you, ensure rules are followed and run the event, unlike football he has no say in scoring. Paul and I fought well. He got the better punches but I felt I got more in and pushed the fight. In the end he was awarded it on points and after 6 minutes of trying to batter each other (getting punched really hurts) we congratulated each other and hugged it out before being whisked away for a post fight medical. As expected the 6 minutes went quickly, although the end of each round was tiring and it was evident in other fights that some struggled to do much in the final round.

Can’t see my bloody nose in this!

I was asked in my medical if I had any injuries whilst blood dripped from my nose. It’s the day after and still too swollen to see if broken or not. I also may have a cracked rib. Ah well.

Overall it was an amazing experience and I don’t regret it. It’s also shown how much I need to improve on my overall fitness, not just running, and convinced me that if a bar fight breaks out I’d be best to run away.

Budget Camper Build – Citroen Picasso

I always fancied a camper but was worried I wouldn’t use it enough to justify the £20-£30k price. Even a relatively basic VW camper was £10k for what is essentially a builder’s van with some flat packed furniture in it and an engine that’s covered more miles than a space shuttle. 

I thought I’d have a go at a cheap micro-camper as a test, a learning experience on camper conversion, and a good distraction from the bleakness of divorce.  

What’s a micro-camper?

Normally based on Transit Connect/Renault Kangoo/Citroen Berlingo/Corsa Partner. They’re more car sized so easier for parking, lower roof so will fit under car park barriers and intended more as sleeping quarters than a full-sized van conversion you could live in. Various companies sell ‘boot jump’ kits that can be stored in the garage and turn the vehicle into an instant camper but these can cost hundreds or even over £1k. They are useful if your vehicle is more expensive and you don’t want to risk devaluing it with permanent mods or need it to be useable as a proper family car since they allow you to keep the rear seats.

What did I start with? – £900

Some of the most common vehicles are the Kangoo or Berlingo. If you get one registered as a car rather than a van then insurance is typically cheaper. You can get a van changed to a camper on the log book with suitable forms and evidence but is one more headache to avoid. Many of these vehicles have been converted to Wheelchair Accessible Vehicles (WAV) which means a lower floor, hydraulic ramps and more head height to allow for the wheelchair so a good starting point. The downside is these often have smaller fuel tanks as a result of the modifications and if you aren’t that DIY competent there can be a lot of winches, motors and safety systems to remove. They can also attract a premium on the second hand market.

The day it arrived

Mostly due to it coming up locally I went with a £900 Citroen Berlingo Multispace. It was owned by a mechanic and used by his wife for girl guide trips lugging camping gear around so whilst a little cosmetically challenged was well maintained and promised to be reliable, with a fair bit of preventative maintenance undertaken recently. It’s a petrol which might be a little thirstier but was also ULEZ compliant if that’s a consideration for you. Given I wasn’t expecting to be driving thousands of miles a year the small difference in mpg wasn’t a huge issue. 

The Multispace means it’s a full five seater with rear seats that fold and a bit more lining and storage in the back. Some of the more deluxe versions have extra roof windows that make it lighter inside but is also another window you need to think about covering for a decent sleep.

Rear seats in awful colour scheme
With the seats folded you can see potential

Windows – £20

Given it didn’t have aircon, plan was to tint the windows I could and black out those that I didn’t need for driving. 

The car has four windows that pop open for like a classic mini rather than slide into the door like a proper car. They’re ideal to allow ventilation at night whilst still maintaining some security. These are easy to remove completely (from the inside) and I took all four out, tinted the rear door windows with dark limo tint (£12 a roll on eBay) and the two in the boot I covered on the outside with self adhesive black vinyl from a DIY store for £8. I didn’t look out of these whilst driving so completely blocking them off wasn’t an issue, added security and privacy and removed a need for additional curtains or blind on these. I also planned to fit storage tight against these on the inside so there was a risk that tint would become scratched or torn on the inside from this. Fitment of both the tint and the vinyl was the same. Clean the glass thoroughly, spray liberally with soapy water, stick the film on and use a squeezy tool to push out the air bubbles and cut the edges with a sharp razor or knife. As all the side glass is mostly flat it’s easy to do and the finished result for such little effort was well worth it.

Solid vinyl on rears

The rear window is more curved and I struggled to do. I’ve singe learnt it’s worth holding the film against the glass with the backing layer still attached and using a heat gun or hairdryer to shape it before trying to fit . If you ignore this you get a wrinkled finish which I can live with as a cheap conversion but would annoy you on a more expensive vehicle.

Floor – £40

My intention was to keep one of the rear seats to allow me to take both kids with me, but bin the 2 seater bench section and associated seatbelts etc. On later models these seats unclip, on the earlier ones are bolted down with Torx bolts. The boot floor is corrugated so I cut down foam floor insulation intended for laminate floor into strips to fill the gaps, needing two strips of insulation to bring it flat, then a full sheet of insulation over the top, with the floor on top of that. The underlay was £20 in Wickes (I needed 1.75m2 so about half a pack) and they had two pack of end of line laminate for £20 in total. Annoyingly I needed only one plank of the second pack. If you can find a neighbour renovating their house you could probably pick up enough laminate to do the whole conversion for free. I cut the flooring around the mounting locations for the single rear seat to allow later refitting. The combination of insulation and relatively thick laminate should keep the interior more pleasant.

Flattening the floor

When doing this section there are two options, stop the flooring over the existing structure and leave the rear footwell open for extra storage but have a reduced floor area, or extend the flooring to the rear of the front seats to allow a larger floor area. I elected to leave the footwell open for storage and to allow access to the hidden storage bins beneath.

Interior Carpeting – £45

Depending on the spec of your vehicle there may be a lot of bare metal in the boot area. It’s cold, ugly and noisy. Easiest solution is to cover with 4-way stretch carpet which is affixed with spray adhesive and then stretched around the surface. The difference it makes is amazing and instantly turns an ugly boot into a living area. Fitting can take some practice so best to start with the easier sections first. Pros can do whole complex panels in one go. If you’re starting out you can do in smaller sections and accept the odd join. I got a decent sized kit including spray adhesive for £45 from Amazon and had ample left over.

Fill any holes or depressions before carpet
No seatbelt this side so easier to smooth
Carpet and floor makes a huge difference. Kept seatbelt this side
Trimmed the seatbelt section from this side and covered

Before carpeting it’s a good time to run any wires or plumbing within the panels. For a small camper there may be none, for a bigger conversion you’re likely to have lights, solar panels cables, speakers, maybe water lines. You can also insulate the sections either with RockWool style insulation or the sprayable expanding foam (this can be messy). Any small holes in the metal from trim clips or similar you can simply tape over with a good quality duct tape before carpeting. Large hole you may need to cover with hardboard, sheet metal or plastic.

Bed or Seating – £20 or £120 depending on your view!

This is where you can spend a lot of money. Both the timber to make the seating or bed and the cushions can run up a large bill. Think about how you want to use the van. If purely for seating then a cheap second hand sofa may be sufficient. If just for a solo sleeping arrangement then a camping bed may do or a chopped down single mattress. Some people will use a mattress topper, or the cushion from a futon, or make their own seat pads with foam and fabric. I wanted a sofa along the side of the camper that would slide out to become a decent sized bed. This is one the hardest parts of the van build as almost nothing is fixed. What height, width, length, material do you want? I have no sewing ability so needed something ready made.

Hmmm potential

I happened to be in a local charity shop and spied an ex-display rattan style outdoor sofa for £100. It included cushions of 60x60cm with weatherproof fabric, zipped covers. They were sufficient to make a bed of 1.8m x 1.2m. A standard UK double bed is 135cm wide and 190cm so only a small difference and would be ample on my own or a little cozy with a friend. This set the size of the bed and sofa so I had something to work off.

Two bed slat sections from IKEA picked up second hand

For the frame I picked up an Ikea bed frame for £20. This included more bed slats than I needed and some decent timber.

The design of most beds is either rock’and’roll where the back of the sofa is hinged and folds down as the base slides out to provide the extra width, or a ladder style slide out (more common). I went for the ladder style with the slats. 

For working out the height, especially in a small camper it’s a compromise – the lower the seat/bed base the more headroom, but you’re also limiting the storage underneath. It can be as basic as placing the cushion on a variety of boxes, buckets and stools and sitting on it to test the height. I went for a setup where if I sat fully upright I was just brushing the roof with the top of my head, but more slouched felt spacious. When laying down on my back I can just touch my palm to the ceiling so there is definitely room for two people stacked should you fancy some sort of press-up arrangement…..

Chest made

I also wanted a fixed storage area so eventually settled on making a flip top chest mounted to the side of the boot that was the same height as the bed and formed part of the overall support structure when the bed was extended. This required the sliding section of the bed to be two parts – a small section to meet the chest and form a ‘L’ bed, suitable for me and the dog, and a larger section that extended the full width and made a full width bed but lost all floor space. Due to the length of the van I needed to add a small fold up section to pass over the folded front seat to provide the full length for my legs. It’s a little compromised but means I have option of collapsing on a shorter, narrow bed with zero effort, or several permutations up to an almost double. Hopefully photos below will explain.

Chest fitted, and L version
L version with cushions
Full width without cushions
Full width with cushions
The head extension is a bit of a work in progress. Supports off the arm rest.

All the rest of the wood was scavenged out the garage and a mixture of DIY leftovers, broken furniture and wood donated by friends to burn in the fire pit.

The advantage of my approach is I have a complete set of garden furniture that I can just borrow the cushions from when I go camping so the bed itself has only really cost me £20 for the Ikea frame. 

Solar Panel and Leisure Battery – £140

I hadn’t intended to fit solar, and just rely on USB large battery packs for my devices when camping but found someone locally selling a full solar set up including 150W panel, two leisure batteries, a solar charge controller, and a 240V inverter for £120. I couldn’t say no. The panel is mounted to two aluminium angle sections (about £10 from Wickes) which are bolted to the existing roof rack. The cables run into the car through a specific roof transition gland (£10 from Amazon) that is meant to prevent leaks and I mounted it under the panel for extra weather protection.

Panel and mounting frame
Panel and roof gland

I positioned the panel off to one side to leave some roof rack spare for a bike rack if I ever took the bike. I debated where to mount the battery (I figured two was a bit much) and eventually decided to put it in a portable(ish) wooden enclosure with the inverter and a 12V cigarette socket output with a quick release connecter for the panels so I can remove the entire thing from the camper if I need more space, or remove from the camper as a portable power source and take to the fire pit. The solar charge controller (SCC) I swapped out for a more modern one with USB included. The point of the SCC is it regulates charging and prevents over discharge of the battery. If you connect a load to the battery directly you could run it completely flat and damage the battery. My 12V cigarette sockets I had from a previous car and are individually switched to allow me to leave several devices plugged in and switch independently.

Wiring the box
Wired up upgraded controller, 12v offtake and inverter with mini fridge

Front Seats – £40

The ones that came with the car were very knackered. I learnt these could be switched with those from a Peugeot 306 so found some and switched over. These are from a three-door model so have a single lever that folds them forward and makes them slide so simple to add more space to the car. They cost about £40.

Curtains/sun blinds – £8

For camping you need to consider blocking out light, sun, and keeping heat in. 

For the front I got a foil fold out sunscreen for £3 online.

For the rear I got a bargain pair of curtains from Temu for a camper, basically one string along top, and two curtains with Velcro that close in the middle. Combined with the tint on the rear door they are almost blackout but not fully – £5

For the six side windows, two are solid black out vinyl so could be ignored, the other six I made card templates and cut sections out from a leftover pack of foil-backed flooring underlay. This is one layer of foil, one of polystyrene style plastic. By gluing two back to back and using foil tape on the edges I made relatively stiff blind that would fold for storage and basically force fit in the window frame. – £free

Not bad for free

Storage – Varies

The more storage the better. To some extent you don’t really know what you’ll need or where until you use it. As well as the large trunk that’s part of the bed I purchased some zip up bags from Ikea for the bedding (£3 each), a roof storage net for £8 and a smaller ‘oddments’ storage net for £3 from Lidl. I also make use of the existing storage areas in the van. Mine has massive door pockets, three gloveboxes and numerous cubby holes.

Roof mounted storage net
Side net for oddments

Eating / Cooking – £25

I had a small portable fridge in the garage so was free. You can pick these up second hand for around £10. They’re big enough to hold 4 beer cans or similar. If you make sure the food or beer is cold (possibly frozen) before you leave you can run the fridge up on mains power to get it cold as well, throw the food in and stick it in the car, running off the 12V car supply whilst you drive to your site, then switch over to the solar 12V socket when on site. Any other food you can also cool or freeze before leaving is thrown in a cool box. Bacon can remain frozen for a couple of days this way. 

For cooking you can pick up camping stoves for about £20 in the sale with some gas cylinders. Cutlery, frying pans etc you can borrow from home. A camping kettle is likely to be found for about £5 in sales. 

I mounted long cantilevered shelf that sits out the back of the van to hold the stove. Again this was made from scrap. Fancier conversions have pull out drawers on long runners but all need more specialist hardware that you’re likely to find in the garage.

Using the shelf with the retro camping stove I found in garage
With the proper stove and a £1 charity shop frying pan

If I needed to eat inside I made a side shelf that folds in two parts to provide a narrow or deep table. This is the one part that didn’t come out quite as well as hoped but is serviceable.

Half open shelf/desk/table
Fully open. Sags a little but works for laptop

Entertainment – Varies – £28

For driving I binned the old stereo that came with the car and got a cheap Bluetooth headunit from eBay for £10 that includes a USB point to keep the phone charged whilst driving. It’s not amazing but works well for Spotify and sat-nav directions and is less likely to be stolen than a decent unit. 

For evening entertainment, I picked up a cheap DVD player with screen for £10 on Marketplace. It’s rechargeable from mains or 12V car so I can charge before I go and get a couple of films watched before I need to recharge from the solar. DVDs are pennies in a charity shop and give you a backup should mobile reception be too poor to watch anything on your phone. I also purchased a USB to 12V adapter from Amazon for £8 which allows recharging from a power bank if you don’t have solar or want to save those precious wiggly amps for beer cooling.

DVD and a fire
Power bank to 12v for DVD charging

Other outdoor stuff – Varies

Given the camper is a little compact, especially if camping for two, I’d recommend a tent to go alongside it. This can be as small as you like just to store stuff outside and help mark you spot if you leave the site, or big enough to use for all cooking, drinking and hanging out.

Day tent and dog tent

I was donated a day tent by a friend as was a getting a little tired. It’s big enough to fit the camper in if getting desperate to escape the sun or to shelter and watch the storm. I tend to use if for furniture, dog stuff, the cool box and other junk. 

I also found a kids sun tent in the loft, it’s a bit chessy but perfect dog size shade and gives her somewhere to go when she needs some me time. 

Other camping essentials are folding chairs, tables, a firepit and a ground spike for the dog lead.

Fitting Peugeot 306 seats to a Citroen Berlingo

Another in the series of ‘really niche articles that have nothing to do with running’

I always wanted a camper, but wasn’t sure how much I’d use one. A combination of divorce and being tight combined so I looked at micro-campers. The idea being they’re more car-like to drive, cheaper to run, easier to park up, less prone to theft than a VW Camper and about 50k cheaper. 

Even aiming for small and ugly vehicles I found the ready-converted ones were very expensive for what was a crap car with a camp bed so I decided to make my own. 

Enter Bernie the Berlingo. Citroens finest. If you’ve never been in one it’s basically a car version of the Berlingo van with more windows and seats. This was a beautiful silver, with a long MOT and a realistic price. So I got it and cracked on with a mini-conversion on the cheap. Intention is the odd weekend with dog or to collapse into after a long ultra. 

The one gripe with the car (other than being so ugly it’s Moma would slap it) was the front seats were awful and falling apart. Replacement seats for a near 20-year-old entry-level people carrier are not plentiful and even those in better condition were still awful. A Google showed that Peugeot 306 seats are a ‘direct’ fit so after some scouring of marketplace I found some 306 GTI front seats in half leather a 10 minute drive so I went for it. 

Some guides on this will tell you to cut the mounting frame off the Berlingo seat (couple of stitch welds) and then use existing bolt holes on the 306 seats to attach, to keep the Berlingo fitment and the height. Mine didn’t work out like that as the Berlingo seats had nothing that could be readily cut-off, so I presume a different design. I went a different way. 

Note – I’d recommend doing one seat at a time so you have a reference point if you get confused. If you have room have all four seats out and tackle a pair at a time.  

Step 1 – Unbolt the Berlingo seat – four Torx bolts and one seatbelt pre-tensioner electrical connector to remove. 

Step 2 – Compare seats – Both seats have four fixing points. The inner fixings (nearest transmission tunnel) bolt down into the floor whilst the outer bolt into the side of the sill.

Berlingo seat – note ‘packers’ on rail on left

You’ll note the mounts are very similar BUT the Berlingo outer rail has two packers welded on the rail for it to reach the sill. A quick measure shows the Berlingo seat is approx. 1.5cm wider. You could just pack this out with washers when installing the Peugeot seats but that’s a bodge and I wouldn’t recommend.

Peugeot seat – note no packers on rail on left

Step 3 – Swap outer rails over – undo three Torx screws on the Peugeot seats and two on the Berlingo seats to remove the outer rails. These are accessed within the seat base. Swap them over and bolt the Berlingo rail onto the Peugeot seat. Width sorted. 

Step 4 – Seat belt pretensioner – the connector on the Peugeot (orange both ends) and the Berlingo (orange one end, green the other) differ. You could cut both off and re-join the correct connector onto the Peugeot but given it’s a safety item I’d rather not. Instead remove the plastic side panel from the Peugeot seat (2-3 Torx screws) and disconnect the cable from the seatbelt itself (likely held on with a metal clip). Do the same on the Berlingo seat (accessible from within the seat frame). Fit the Berlingo cable to the Peugeot seatbelt and reattach the metal clip. Remove the plastic sleeving around the Berlingo cable and instead route through the same cable management as the Peugeot one used (this is why doing one seat at a time helps). Use a cable tie to neaten up as needed, and clip it onto the plastic tray connector holder on the bottom of the seat.

Berlingo connector
Peugeot connector
Peugeot pre-tensioner with cable connected and metal clip
Berlingo Pre-tensioner with cable disconnected

Step 5 – Test Fit – You’ll note the Peugeot seats are lower than the Berlingo. As such some of the plastic trim around the rails may need to be trimmed depending on the exact model of Peugeot seats. In my case, the driver’s side needed a small section of the Drivers side outer rail trim cut off at the back to allow it to slide fully back.

Step 6 – Bolt In – Before placing in position use the adjuster under seat to bring the rails as far forward as possible (so the seat is in the furthest position from the steering wheel). This allows you to bolt the front two points in first as they’re the trickiest to do. Place seat in car, lean it back to connect the cable, then make final position. Bolt front two bolts up. Slide the seat fully forward using the lever, then bolt the rear two points in. Congrats the seats are in. Stand back, position your dog for a photo and marvel at the awesome upgrade.

Note –  

  • The seats will be lower than the ones you removed. If you’re really short this may be an issue. If really tall or like wearing top hats this is a bonus. 
  • You probably should disconnect the battery before removing and refitting the seats as there an immeasurably small risk of the seatbelt pre-tensioners going off.  
  • Depending on the Peugeot seats you may find they don’t fold as far forward when using as a camper due to thicker bolsters and different mechanisms (most camper beds run over the front seats for the added length). In my case the seats were from a 3 door so had a handy single lever to fold and slide forward to access the back seats. Combined with lower height they’re better than what was removed. 

Disposable Vapes – repurposing the crappiest invention

I don’t vape. Mostly because I never smoked so didn’t feel the need to graduate to sucking a robot penis in public.
If you do then cool, everyone is really impressed by the big clouds you blow out and I expect you get bored of turning down sexual advances based on your highly upgraded vape kit.

If you smoke the disposable vapes you might not have considered what’s inside them. They look similar to a pen, you suck them off, then throw them away like an unwanted date. Sadly like jilted boyfriends many seem to end up in the gutter as there must be a large overlap between people who litter and people who suck mango smoke.

Due to the high current needed in a vape they don’t have cheap single use batteries but instead have relatively large Lithium batteries, fully rechargeable but the units are made with no provision to do so and become single use. The capacity of the batteries can be as much as half of a modern iPhone (1500mAh Vape vs 3227mAh for an iPhone 13) yet are thrown in the bin with little consideration for recycling or use of materials and associated risk down the waste stream of uncontrolled fires (if punctured or become wet they can be very dangerous). Most people wouldn’t throw an iPhone in the bin, you’d at least take some steps to try and ensure reuse or recycling.

According to Sky News “Users in the UK are throwing away around two disposable vapes every second. The number of discarded disposable vapes accounts for around 10 tonnes of lithium being sent to landfill or waste incinerators each year – enough of the metal to make batteries for 1,200 electric cars.”

So what should you do? Don’t use disposable vapes, switch to rechargeable kits or better yet stop. You look stupid. Seriously. If you need an excuse to stand outside the pub in the rain trying to look edgy and cool, then take up sword swallowing.

If like me you find a lot of them, you might be curious to take them apart.

The most common types I seem to find are Elux Legends 3500 puffs and Elfbar 600 puffs. Surely anything measured in puffs is self evidently stupid? (Asthma inhalers aside).

Let’s open the Elfbar. It’s about the size of a fat marker. And less useful. Smells worse too.

Inside of an Elfbar. A lot of (slimy) stuff for a single use product.

You may need to warm the bottom slightly with a lighter but should then pull it all out. If careful it will come as one section and in theory you could recharge and reuse. The sponge certainly seemed to be wet with skanky liquid still.
Inside is the sensor/light at the bottom, the battery, the heating element and pad full of tasty tasty chemicals before the mouthpiece you suck on as you regress to infancy.

In this instance the battery is a 13400, 3.7V, 550mAh and 2.04Wh – it’s pretty small. A typical alkaline or NiMH battery in the standard “AA” size has about 2000 to 3000 mAh but at only 1.5V.

Mostly to stop the stench, bin everything but the tube, the ends, the battery, and the rubber sections can be useful for separating the components if you re-use the tube.

Next the Elux and as before, warming the bottom should allow you to pull it out.
Same arrangement as before, and again bin everything but the battery, end caps and rubber sections. It’s handy to leave some length on the wires if able to allow some basic testing before re-use.

Same arrangement of stuff in an Elux. If you open carefully it will come out as one. I wasn’t careful.

In this instance the battery is a 20400, 3.7V, 1500mAh and 5.55Wh – it’s three times the size of the Elfbar but still small compared to a more common 18650 battery as used in rechargeable vapes at around 4200mAh.

Battery Sizes

The battery numbering isn’t random, it’s the diameter then the length in mm.

18650 “standard” rechargeable vape battery and common for head torches, and lots of products is 18mm diameter, 65mm long.

20400 battery used in the Elux is 20mm diameter, 40mm long. This 2mm difference in diameter means it may not fit in enclosures designed for the 18650 even if you can get around the reduced length.

The 13400 battery in the Elfbar is 13mm diameter and 40mm long.

This powerbank case just about squeezes a 20400 battery in place of a 18650. If you could fit two and get around the reduced length it would be a decent capacity of 3000mAh.
The positive and negative are denoted by tape (red is positive) and the labelling. Make sure you get correct orientation.

What now?
Firstly you can’t just throw the battery in a standard AA charger pack. Aside from the size issue it needs to have battery protection during charging and use. Fortunately you can buy suitable USB style boards to solder on and they are typically £2 each in bulk on eBay and also Amazon.

TP4056 5V 1A Micro USB 18650 Lithium Battery Charging Board

TP4056 and comes with various options of USB cable sockets to suit your need. They are a complete constant current-voltage linear charging module for single-cell 3.7 V lithium batteries. In use it continuously monitors the voltage level of the battery during charging and discharging.
They are wired up as below (thanks for diagram Electrothinks) with the battery, the load (output via switch or however you wish to use it) and option to hardwire an input rather than USB if needed. Pay attention when ordering as some don’t have the additional solder points for the load/output so only useful for charging.

LED colour – the TP4056 LED indicators will vary depending on supplier but most seem to have steady red/amber for charging, a flashing red/amber for battery issue and a steady blue for fully charged.

The output of the TP4056 is exactly the same voltage as what the battery is providing, and not stepping up the voltage to a consistent 5V for USB use for example.

A TP4056 (charge only) version in a cut about memory card case. Charging a 1500mAh unit.

USB Power Bank Circuit Board 134N3P

These are similar boards to the TP4056 but have a full size USB at 5V (not 3.7V) out for the load making ideal for power bank use. They typically have a completely different LED system – flashing red/amber light for charging, a solid red/amber for fully charged. When discharging have a steady blue light.

A 134N3P unit charging a 550mAh Elfbar battery. Will test charge on Garmin and look into making a compact version, potentially with the Garmin specific lead hardwired. Black wire was from the Elfbar and a little small for continuous use.

Don’t want to buy a board to test if the battery is any good?

In my case I had a spare power bank kit designed for a 18650 battery that I could temporarily bodge a 13400 battery in to check. Copy at your own risk etc.

Charging via micro-USB
Output via full size USB. Blue LED to indicate use.

As noted above I’m keen to make up a super compact power bank for charging my Garmin GPS during long ultras. Depending on models these have 320 up to 420mAh batteries so even the smaller 550mAh battery unit from an Elfbar should be enough for a full charge, possibly two long charges. If I can do it by 3D printing an enclosure or even bodging something with excess duct tape I can have a free charger that if I do happen to lose or leave at an aid station I won’t cry about.

Ghetto version inside an Elfbar

In the meantime I made up a very cheap and nasty power bank from the Elfbar using a spare control board and power leads from a freebie promotional battery pack I was given at a trade show that died (batteries expanded and were in danger of splitting).

USB input and output leads are already attached from previous life, just needs battery on the B+ and B-

I soldered the Elfbar battery to the board and then wrapped everything liberally in electrical tape to prevent any shorting on the metal case.

If you solder like a blind man then cover it with tape.


Shove it all back in with a very bodgy cutting of the mouthpiece to squeeze the cable through and it’s done. Not pretty but surprisingly handy. Charge via full size USB, and then use on devices with Apple or micro-USB.

Fitting a 20400 Elux battery into an eBay case

Picked up a DIY powerbank case from eBay for £2 that looked like it had enough room to squeeze the extra 2mm of the 20400 battery in and potentially could be cut down. I’ve yet to find any kits designed for the vape batteries so best to get one that suits the 18650 and see if you can squeeze in.

Has the same combined micro and full size USB for charging and discharge. Trimming the middle row of splines either side of battery allowed a nice tight fit without distorting the case.
Didn’t want to make permanent changes to case so soldered + to the board and – to the bottom spring for test use.
Flashing light for charging and blue when discharging, just about visible through case.

Other ideas

Will continue to have a play. Looks like potential to squeeze two of the larger batteries into a single Elux with a 3D printed end cap to add some space.

Also potential to use the Elfbar battery inside the original case and cut down a little as a lightweight 18650 battery alternative for emergency use – some of my ultras require a backup battery even when taking place in daylight.

London Calling – Week 7 – race week!

Final week rolls around and it’s the final countdown to the TCS London Marathon on Sunday.

Monday – had some time to kill waiting for daughter at a club so went for a run in the woods. Even with a torch it got dark a lot earlier than expected and I reasoned this was not the week to trip on a tree root so came back on the road for 10k at a very pedestrian 11:16 mile pace. I’d love to say it felt like a jog but in truth my legs feel wrecked from ramping up the miles.

Chased in woods by vicious monster / tiny deer

Tuesday started with a spin class, with the evil/great instructor and my legs are wrecked for the cycle home. In the evening after a warmup I manage my fastest attempt at the 7:30min/mile paced run since start of July and a real confidence boost. Maybe I can remember how to run with some pace?

Common to much of the UK there’s a sickness bug sweeping through the house and I’m hopeful of avoiding it until next week as it’s consigned wifey to bed for a couple of days which is unheard of.

Wednesday was a surprise performance at the Brickhills 9 mile – Not only a second decent run in as many days and best since June but I actually have to do a couple of (tiny) runbacks for first time in months. It’s also a handy chance to pass my Expo collection pack to Jen for her to get on my behalf as I view Expos as only marginally more fun than colonoscopies.

My awesome shorts arrive for race day and the world rejoices so despite planning to take the rest of week as rest I join some mates for a gentle 6 miler on Thursday to test them out. They are not terrible but I suspect the elite would not recommend.

Final training run done, and 26 miles for the week so far. September ends (wake up that bloke from Greenday) and I’m pleased to record 211 miles for the month. 200 mile months used to be a mainstay for many years but since 2021 have been a rarity so it’s a good boost.

The last minute matching hat arrives and I shave the weirdy beardy to save vital race weight! Saturday I potter around mowing the lawn and trying to ignore the itchy throat that might be the start of the bug.

The less you look like a runner, the more impressive your minimal performance will be!

Sunday 2nd October 2022 – TCS London Marathon Race Day

It’s 5am and I’m up and getting dressed, making final check on weather as it’s been threatening rain all week but now looks like we might escape. To avoid parking and allow me to have a celebratory beer I decided to take one of the electric scooter rentals to the 6am coach collection for Redway Runners. The scooter cuts out tree times on route, and a further stop when I panic I’ve forgotten my running trainers (I hadn’t) means I’m nearly last one on but finally set off on way to London. With a quick service station stop for coffee and a bacon bap (I still prefer real food before a race) we pull up at Blackheath at around 8:00am.

I’m in Blue start wave 3 so due to assemble in the pen at 9:36 and start 9:49am. Time for a few toilet visits and to chill with other Redway Runners in a huddle on the ground. Unlike last year it’s surprisingly warm so I’m almost too hot in my borrowed coat and trousers I intercepted from the sister-in-laws charity donation. I do look pretty baller though and the organisers will collect all clothing discarded for charity so I’ve basically borrowed them.

Getting into the waves – I didn’t know it but I would spend most of the next 20 miles swapping places with the bloke in the striped top and phone bra.

Finally we were called forward and could set off on a little jog around London. I’d intended to run 8:30 pace as long as able but as usual got swept along. Unusually for London they seemed to make a big mistake on the starts and the Red wave was delayed and when it finally joined the yellow and blue was completely mismatched. Sub3hr runners were furiously trying to duck and weave around the masses and the 3h30 blue pacers. There was a lot of commotion and accidental, sometimes intentional barging as they forced their way through a never ending roadblock of slower runners. It looked more like miscreants trying to evade police capture on Oxford Street than an organised race at times. I was glad not be a runner that had trained for months for this single chance at getting their PB only to be entirely defeated by the logistics.

Poor running form 101….

For my own race I largely forgot my legs and the act of running and just enjoyed the experience. I was getting a lot of love from the crowds and this coupled with knowledge of running it a few times before meant I was mostly on a sight seeing tour of London whilst my body got on with it. My only real mental input was remembering to keep on top of gels and hydration and look out for any obstacles. Even from Wave 3 there seemed to be a lot of walkers from early on.

Not the best pacing.

As expected given the limited training I did start to feel the miles around mile 15/16 but was well up on my planned “hopefully sub4” so with a mixture of caution (I remembered the debilitating cramp at the later miles of MK marathon) and acceptance of my fitness I resolved to be a little more cautious up to the Hash House Beer Table at mile 22 and then really take it easy. This is the first time I managed to get a beer and it was much appreciated, cold, refreshing and cutting through the gels and Lucozade.

22 miles is often the do-or-die point of a race. If you’re aiming for PB, GFA etc it’s when you have to decide to double down, ignore the screaming legs and get the job done, or back off and finish a failure as you just didn’t want it enough. In my case I would have needed a teleportation device for a PB so mentally was easy to sit back and tick off another sub4 at 3h46. Given I failed to hold sub4 at Milton Keynes I was content to get the job done.

Yes as expected my nipples bled so much I may have stained my shorts.

To boost my charity donation I’d listed my medal and top on eBay and was pleased to see a notification that I’d sold them for £175 when I check my phone post-race, so no medal selfie for me as mine is already winging it’s way to a new home. Post race I went to the charity event where I couldn’t face food but a nice chap called Junior tried to massage into the floor whilst I cried.

Random thoughts on my performance –

  • For limited training it’s a great result. I always want to get sub4 on a marathon but over the last few years that has stopped being a certainty.
  • With enough experience to disassociate from the physical effort marathons are far more fun. I only really ‘ran’ for 8 miles.
  • It’s not as quick as last year so I won’t be leaping to get another booked in (handy as I can’t find one locally).
  • Whether through sheer stubborn refusal to get sick before, or accelerated by the physical effort the bug found me Sunday night and beat seven shades out of me. Fever, cough, aches, all the good stuff. Were it not for a negative test I would suspect Covid.

Random thoughts on the first TCS London Marathon now Virgin Money have gone –

  • The medal and top are the best in years. 2021 medal looked like a bizarre misprint and would have been disappointing at a local village event.
  • Aside from the issues with Red start it all seemed well organised
  • The crowds were the most vocal and supportive I’ve ever experienced, maybe a result of the first year being ‘free’ of the spectre of Covid?
  • Possibly as result of the red start issues there seemed to be more runners with a lack of race etiquette. One knob decided the line between runners and the Lucozade volunteers handing out cups would be the best place for a sprint so ran the fall length of the line, smacking multiple arms out the way and showering runners and volunteers alike in sticky drink. You sir, are a dick.

London Calling – Week 6 training – one week left

6th week of training and only 2 weeks until London in the unconventional plan. Plan was a slightly lower mileage week, Normally I’d keep relatively high mileage until start of the final week with a 5/6 day taper but given my recent tendency to injury I figured a more cautious approach is needed.

Monday after a 20 miler the day before I took the day as rest day, and busy schedule meant I didn’t make a spin class.

Tuesday Morning Spin, then double evening run. 4 miles with Redway 7:30min/mile paced run at a ‘slightly more shit than last week’ 7:34. Legs still felt heavy from the previous week. Followed up with a chatty 6 miler with mates.

Wednesday I was hopeful of getting back to my ‘less shit’ pattern of last couple of weeks but sadly failed and did a pretty slow early morning 9 miles, helping the other runners to get more mileage on runbacks. My hip was a little stiff and I managed to chaff in an intimate place due to poor short choice so overall a pretty demoralising run. 10 days out from the race you don’t want to feel creaky, sore, slow and a bit shit. In the words of Chris “When are you going to start getting faster again?”

London also released their app so people could log in and see start time etc. I’m in Blue 3 and despite initially showing a start time much earlier now shows 9:49. The upside is the pubs will be open when I finish, the downside is a lot of waiting at start as getting the coach down by Redway Runners, a fortuitous choice as they’ve just announced rail strikes on the Saturday that will affect the Sunday marathon as well.

Thursday again failed to get to morning Spin so just a leisurely 7 miles in the evening.

Friday I took as a semi rest-day and just Spin at lunch before heading to Isle of Wight for a family weekend away.

Saturday I tried a hard effort at parkun at the Medina IOW run but found not knowing the course and the wet grass added to my lack of fitness and managed 24 minutes. It’s a nice event but given how amazingly gorgeous IOW is, having the only parkrun held around some non-descript playing fields that could be anywhere in the UK seemed an odd choice. The performance did remind me that accidentally running 7:30 pace for London as I had the year before is not going to happen and I should stick to 9min pace.

Sunday was long run time. Being somewhere new it was a relief not to have a set pace or distance in mind and just run about taking in the scenery and pausing for some photos. Isle Of Wight is gorgeous and I will definitely be back. In the end managed just over 9 miles at a very pedestrian pace, and finished at 37 for the week.

From a very low base in July I’ve managed a relatively structured increase in mileage and pace with three 50+ miles before starting to taper. Given I’ve managed years of uninterrupted 50+ mile weeks it’s a long way below what I would like to be able to sustain but feels about right.

Gels and Caffeine Bullets have arrived for London, just hoping my duck shorts make it in time.

London Calling – Week 5 training – a race

5th week of training and only 3 weeks until London in the unconventional plan.

Monday started with early Spin class then whilst killing time waiting for daughter in clubs I ran a 7 miler with Jonno. The first mile was awful and one of those ‘oh god I can’t even run a mile why am I even bothering’ but eventually loosened up. I’ve definitely found with declining fitness and advancing age I need a few miles to get in my stride.

Tuesday I slept in and missed Spin so did double evening run. 4 miles with Redway 7:30min/mile paced run at a ‘slightly less shit than last week’ 7:23. Followed up with a chatty 6 miler with mates.

The queue to see the Queen’s coffin opened, ahead of the service on the Monday. It’s very popular and a bigger endurance event than most ultras. The average pace is about the same too.

Wednesday I was hopeful of continuing my ‘less shit’ pattern of last couple of weeks but sadly failed and did a pretty slow early morning 9 miles, helping the other runners to get more mileage on runbacks. They did point out that I’d run a marathon distance for the week including 3 runs in 12 hours and that probably wasn’t good training.

London also released their ace guide including the helpful checklist –

Thursday started with Spin then an evening run, plan was for 10 but nobody seemed keen so stopped a just under 7.

Friday I took as a semi rest-day and just Spin at lunch.

Saturday I tried a hard effort at parkun and managed 22m28s which is pretty poor based on previous performances but fastest since June so definitely heading the right direction. I’d like to say I was holding something back for the subsequent race but that would be a lie.

It was also new shoe day as I needed to use my life insurance 50% voucher so replaced my very tired Hoka Rincon 1 with Rincon 3. This was the only colour way they had:

Sunday was a difficult decision. Last year, also in a state of disrepair I ran the 60k Big Bear Ultra two weeks out from London as a final long run, ignoring that it was too long, and it seemed to work well. This year I was even less fit so decided to take the sensible option of the local Redway Runners Old Money run. It’s a choice of 5 or 10 mile, and I decided to run 10 miles first as a warmup, to get a full 20 for the day.

Was very sluggish for the solo 10, averaging 9m51s but kept it gentle effort, my only goal being to get the 10 done in time to register and run. For the race itself I managed 8m09s average, even with getting lost with a group of others. Optimistically I wanted to complete the 20 under 3 hours to be in with a chance of sub4 at London and I just scraped under despite no breakfast and only two gels so hopeful on race day I should be able to push harder.

Total mileage for week – 56, with 3 spin classes

Final long run done, now just……

12 days until London Marathon!

London Calling – Week 4 training – a bit less crap

4th week of training and only 4 weeks until London in the unconventional plan. Many runners have just completed the Great North Run as a fast Half Marathon effort. I haven’t as I get nose bleeds past Watford Gap.

Given I started Monday with heavy legs after the Sunday marathon conventional wisdom would be to rest. Old Mark would have probably gone for a run. I split the difference and did a spin class to ease the legs off.

Notable this week is the pillowcase of custard finally stepped down as Prime Minister and after significant barrel scraping the Conservative party ran out of anyone worthwhile to take the seat and finally confirmed a near-sentient confused owl as the new PM. It’s difficult to go downhill from Theresa May but we’ve managed it twice.

Tuesday I started with spin again and then made a decent effort at the Redway Runners 7:30 paced 4 mile run. I was a little less awful than the week before, despite the marathon, and in current form ‘less shit than last time’ is my main aim. I followed it up with an easy paced 5 mile with others to loosen off.

Wednesday I kept with the theme and ran my usual Brickhills 9 mile loop a little less shit than last time. 8:30min average pace, trying to ignore that sub8 was my more usual state.

Look, runners!

Thursday I couldn’t get out of bed for morning spin so just a 7 mile with the clubmates in a bumper turnout. I really should have pushed to nearer 10 miles but a mixture of laziness and sensible caution not to push it prevailed. It was also the day we learnt of the passing of Queen Elizabeth II so even non-royalists were saddened.

I failed to fit a run in on Friday, but did manage a morning spin class again. I’m really hoping these hard efforts with no impact will gradually bring back some cardio and endurance.

The weekend had an odd feeling, with many events from football matches and fetes cancelled, whilst rugby, cricket and parkrun went ahead with respect paid and a period of silence. As is the way, the more outspoken of the public attempted to outdo each other with their mourning and publicly shame anyone that didn’t plan to spend 10 days in a darkened room crying and neglecting basic hygiene. For some it’s not enough to grieve, you must ensure everyone else grieves in your narrow and pre-selected definition of mourning.

Saturday I had plans for a long run, ideally 18-20 miles, achieved by a lap of the MK Winter Half and then MK parkrun. I struggled to get out the door in time and instead had an 11 mile warmup, before a parkrun then home to record 16.5 at a not terrible 9:15 average pace making me think a low 4 marathon is possible at London with another couple of months of training. Shame I’ve got 3 weeks.

In the afternoon Charles was sworn in as King and we finished the week with an unelected PM and an unelected head of state, reminding everyone just how great the democracy is in the UK.

At the start of the week this man owned ZERO swans. By the end of the week he owned EVERY swan in England.

Sunday I slipped out for an 8 miler to round the week up to 50. I swallowed a dim-witted wasp and nearly choked, probably as penance for questioning the monarchy.

20 days until London. Time to focus on important items like making someone else collect my bib.

London Calling – Back to the big smoke

For me 2022 has been a bit of a wash out. I’ve DNS’d more races than in my entire running history. Go me!

I’ve not started –

  • Fred Hughes 10 miler – torn hamstring slipping on ice at start of running build up
  • South Downs Way 50 – poor admin meant it clashed with a holiday
  • North Downs Way 50 – tail end of Covid and hideously undertrained
  • Warwickshire Ring Canal 111 mile – still undertrained and train strikes added extra headache
  • Lakeland 100 – A failure at the hilly Wendover Woods 50k two weeks before convinced me it wasn’t even worth the drive up there just to become a liability to the organisers

I’ve failed to finish –

  • Wendover Woods 50k – got 10 miles in and my piriformis was getting progressively worse and painful. Given it was a test for LL100 I’d already proven I wasn’t fit enough or injury free so headed home.
Before the DNF at Wendy. Photo nicked off Coops.

I have managed to finish some races and by standards of the average hobby jogger haven’t been awful but when I expected to be smashing at least one 100 miler this year and haven’t gone over 40 miles it’s pretty sucky.

Malta marathon, unexpectedly my best performance of the year and still a bit crap.

Finished –

  • Malta Marathon – March – returning from hamstring injury I felt undertrained but pleased I stuck it out as a 3h38 finish is still my best of the year
  • Born To Run 30 Miler – April – a beautiful trail ultra in California that coincided with holiday. First event where niggles seemed to be OK and I ran pain free, but struggled with fitness. Two days later I had a confirmed Covid case so performance probably 50% Covid and 50% being a fat sloth.
  • Milton Keynes Marathon – May – was pacing 4hrs and although less easy than I’d like was on target until cramp at mile 23 reduced me to a walk and I had to wave off my runners. Finished in 4h08m which seemed awful.
  • Shires & Spires 34 Miler – May – Longest run of the year and went well. Fitness seemed to slowly be coming back and was a good day out.
  • Enigma Marathon – June – Maintained my injury free status and wanted some redemption from Milton Keynes. Instead my guts decided it was their turn to mess up my plans and it was the start of 2 weeks of awful stomach issues. Waddled around in 4h22 spending most of it remembering when 3h30 was a formality and bowel explosions were things that happened to other people.
  • Greensands Ridge Relay 34 Miler – June – At tail end of the stomach issues so after two weeks of minimal food I was finally less chubby but also under-fuelled. Managed to mainline gels and caffeine tablets and had a decent run even managing a fast couple of miles to finish.
  • Redway Runners 24hr – June – With no intention of beating my previous 104 miles at the event I was just looking for a long run before the Canal Ring. Managed 39 miles as longest run of year then went home to relieve the babysitters.
The start line of the MK24. Weeks of stomach issues mean I don’t look like a fat chud for once.

In theory this should have left me in June on a steady return to form, maybe event attempt the canal race. Instead I had a piriformis issue randomly occur on a 4 mile tempo that was so severe I struggled to put weight on my leg and even contemplated going to the Hospital. Rudi at the Treatment Lab diagnosed it and gave me some exercises to ease it. I rested for a couple of week, losing any semblance of fitness and found it was still stiff and caused me to drop from Wendover Woods 50k and Lakeland 100.

As well as the gastric issues, my son also decided to share the class vomiting bug a few weeks later so I had a fun three days where it felt like I was puking up my soul. Apologies to anyone that frequents the local allotment car park as when the bug hit it really hit….

As a measure of how poorly the year had gone, the previous time I ran LL100 I was on 2000 miles by end of June. For 2022 I had yet to pass 1000 miles and found anything faster than a 9 minute mile reduced me to a sweaty, panting, limping mess.

Refocus –

Clearly any dreams of a 100 miler for 2022 were dead so I needed something else to focus on.

By luck I saw https://familyholidaycharity.org.uk/ had some runners drop out of London 2022 due to be held in October and were looking for last minute replacement with a far lower fundraising limit. I put myself forward and was accepted so on 18th August I got place for London a mere 45 days away and began to gradually build up the miles. Knowing a sudden jump in miles would likely break me I also joined the local gym for the spin classes, figuring some cardio work that didn’t have impact issues would be a good start.

Training for a marathon in 7 weeks. How to. Maybe…..

Week 1 –

32 miles including a 9 mile, a parkrun and the amazing Beerathon (5 miles, 5 pints, plus a lot more after). A non-typical training week and found the end of the 9 miles a struggle. This was now a ‘long run’. I tried to ignore everyone on Strava already at 18-20 mile training runs for London and in the second half of their 14-16 week training blocks.

Just a normal training run at the Beerathon

Week 2 –

46 miles – Started with a 10k that took over an hour and had to ignore the voice that reminded me anything slower than 45 minutes would be a failure when I was fit. Pushed the distance on the long run to 13 miles and struggled, largely walking in the last mile. Everything felt harder than it should. Tried the 7:30 paced run and struggled to break 8min/miles. Achieved my slowest ever loop of the Brickhills from over 200 attempts. Even the 5k loop for the Blackened Sun monthly beer run felt hard and left me a sweaty mess. 5k. Less than 1/8th of a marathon…..

The widest ford in Dorset. Exciting!

The week was somewhat saved by a holiday to Dorset and Sunday morning I was distracted enough with route finding and scenery to manage 12 slow miles.  Given the increase in overall mileage it probably went as well as to be expected.

Week 3 –

56 miles – Started with a scenic trail run in Dorset. Intention was to push double digits but really felt lifeless and looped back for 8 miles. Decided to go for something shorter the next day and managed a 3 mile tempo, ignoring that tempo now meant 9 min/miles not low 7s.

Moo-ve cows, I’ve got a run to do!

In place of the usual Brickhills I ran trail from Weymouth back to the holiday park for 9 slow but hilly miles, felt stronger so set off with good intentions the next day only to walk in a pathetic 5 miles on legs of death like a failure.

Turned up to parkrun hoping the legs of death had passed and recorded my slowest run of the year. Yeah! Not only could I barely run double digits I couldn’t hold a reasonable pace for a parkrun and had two sucky runs in a row.

Sunday was 4 weeks until London. Many London runners would be finishing their final long runs and considering the start of the taper. I’d not run over 13 miles since June so should really get a 18-20 miler done. Instead, relying on previous experience of just getting on with it, I made the unusual decision to get a last minute spot for the Dunstable Marathon. Given the above issues you’d question the logic.

My thinking was to battle the mental block of the 12/13 mile runs and just grind out a marathon, hopeful that it would also force my various niggles to put up or shut up, whilst reminding myself that after 150+ successful attempts, I can get a marathon distance done. It worked. Although slower than my previous attempt by a full hour and with some death marching normally reserved for final miles of an ultra I held together for the full 26.5 undulating miles and none of the niggles got any worse, a few quit whining and just went away. I finished the week sunburnt, tired, but confident I had at least a base to build on and with the good ache in the legs of a long run done, not my more regular injured ache.

Finding an ice cream van at mile 20ish was welcome

Week 4 is next and also 4 weeks until race day. How far on the road from ‘able to finish’ to ‘able to run well and enjoy it’ can I get?

If you’d like to sponsor me then please visit –

https://tcslondonmarathon.enthuse.com/pf/mark-atkinson

BMW Automatic Transmission Warning 420106 – Fix

If you’ve got a modern BMW or Mini with the steptronic auto box you might well be greeted by the “Secure vehicle with parking brake when stationary. Have the problem checked by your Service Partner.” error message.

If you check diagnostics it will show code “420106” and code error look up suggests “Shiftlock solenoid: Selector lever wrongly not locked in P”

This comes up on BMW 2 series, X1 (F48), X-drive 2 series, Mini Countryman (F60) and many other with the same steptronic box.

For me it occurred on a 2016 BMW 220d Gran Tourer at about 95k miles.

Yeah ignore the dust – car needed a clean.

Cue lots of panic and internet research.

Essentially it comes down to the car no longer being able to confirm the lever is in ‘park’ so throws up an error asking you to stick the parking break on. The gearbox is still fine, the selector is fine, the engine works as before, everything will continue to work, but you’ll get the error until fixed and I’m not sure it would pass an MOT with this error up.

The problem is with the selector mechanism and as I found the part isn’t cheap. You’re in need of “BMW Gearshift Steptronic – Genuine BMW Part 25168483098” – the cheapest I could find new was £600+VAT. Add in labour and you’re looking at circa £1k. Saw one driver quoted £1170 from a BMW main dealer. Great. As the cars age this could start to be majority of the cars value.

Fortunately a very helpful chap has done a full video (see below) on this and the issue is a tiny torsion spring that has snapped within the selector so it no longer pushes a magnet as you engage ‘P’ and can’t trigger the reed switch (a small encased hinged metal piece that is pulled down and closes the circuit to confirm position).

This is the spring. It’s pathetically small in real life.

The spring is available from eBay for as little as £4. Yep the car is throwing up errors and potentially costing you £1170 for a repair due to a £4 spring. Aren’t modern cars great?

See the broken ‘leg’? It’s held on by sheer will at this point and should be straight.

On eBay search for “Torsion Spring for Gearshift Steptronic Repair” and part numbers will typically be 25168483097, 25168612145, 25168638224, 25168666164. The one I purchased was here

I won’t try and recreate the video as he does a great job – even listing the tools. I’d recommend watching it through a couple of times first and having it loaded on your phone ready to pause at each step. The trim removal tools and the torx/star bits are probably the only items you’ll need to buy.

Image taken from M.Ovidiu video

As well as the tools he lists I’d get some decent torches/worklight and a number of trays to keep the fixings in. Another trick from working on old cars is get some carboard and push the screws through and label up with where each set came from.

One way of storing bolts – example only

The work is actually very simple but it does initially seem daunting and by the time you have it all out you may start to panic about how much is removed and how you’re ever going to get the car to the garage for them to fix if it all goes wrong. Keep the faith! Work slowly, remove the cables carefully and don’t rush yourself.

The only area I struggled with was making sure the selector was in the right position when trying to disengage the selector cable pin (7:33 in the video).

If the video below doesn’t work then search Youtube for “BMW 2 series f45 F46 ”secure vehicle with parking brake” Problem FIX”

Once done, assemble as shown and reset the computer as he shows and it will all be fixed.

This took me about 3 hours all in, including searching for the tools and trying to find a torch. I reckon 2 hours would be possible next time, probably under an hour for a mechanic. It’s entirely possible for a competent DIYer to do yourself and save £1170. Even if it took a full day that’s a decent saving and potentially keeps the car out the scrapyard.

Once these cars become cheaper it might be an idea to buy a second hand selector from a scrapped car, replace the spring at the comfort of your desk and then do the swap of the selectors, allowing you to upgrade the removed selector and sell on for the next sufferer of the problem.